Top 5 Signs Its Time to Replace Your Ballast or Driver
Posted on Thursday Jan 16, 2025 at 07:50PM in Educational Resources
Why Ballasts and LED Drivers Matter
Updated: August 28, 2025
~7 min read • ~1,500 words • Flesch ~60
TL;DR: Ballasts and LED drivers control current and voltage so lights start, dim, and last as designed. For code, confirm a luminaire disconnect for double-ended lamps (NEC 2023 410.71), install and use equipment per listing, and keep 0–10 V control conductors in the right class with required separation. Select drivers by output current and voltage window, verify control method, check temperature ratings, and label conversions. Stock common drivers, electronic ballasts, 0–10 V cable, dimmers, and SPDs to reduce downtime. [1][2][3][4]
Why this matters on the job
Ballasts and LED drivers regulate voltage and current so lamps and luminaires start reliably, run efficiently, and live their rated life. When they fail, you get flicker, dropout, nuisance trips, and callbacks you did not bid for. Modern drivers also handle dimming and protection, so choosing the right unit affects energy, controls, and safety. If you are converting legacy fixtures or maintaining mixed sites across Nassau and Suffolk, a smart driver or ballast choice saves time and avoids AHJ redlines.
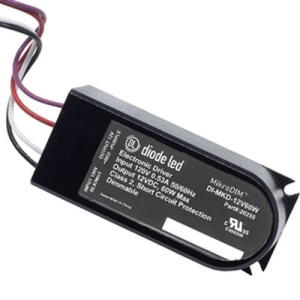
Need replacements fast? See LED drivers at Revco for stocked options sized for common retrofit and new-work jobs.
Fundamentals
- Ballast vs driver: Fluorescent and HID need ballasts to limit current and provide starting voltage. LEDs are current-driven devices, so they use constant-current or constant-voltage drivers that regulate output to the LED load.
- Dimming basics: Common methods include analog 0–10 V and phase-cut. With 0–10 V, many drivers use a current-sinking input; some legacy gear source current. Confirm which side sinks or sources before you land control conductors. See DOE’s 0–10 V study for behavior and variation [2].
- Safety and listings: LED drivers and related subassemblies fall under UL 8750 for use inside listed luminaires or field-installed kits. Keep components within their ratings and listings [3].
Browse ballasts and drivers in stock or pair controls with 0–10 V dimmer modules when the spec calls for analog dimming.
Code & compliance (NEC 2023 refs)
- Disconnecting means, double-ended lamps: NEC 2023 410.71 requires a disconnecting means for fluorescent or LED luminaires that use double-ended lamps and have serviceable ballasts or LED drivers. Install an internal or external disconnect, and add one when you replace a ballast or driver in an existing luminaire [1].
- Listing and instructions: Install and use products per their listing and manufacturer instructions (NEC 110.3(B) and 410.6 for listed luminaires and retrofit kits).
- Controls wiring: Identify the driver’s classification for the 0–10 V input. Maintain required separation from power conductors per NEC 725.136 for Class 2/3 circuits. Keep splices accessible.
- Locations: Use luminaires and components marked for the environment, such as damp or wet. Verify driver temperature ratings against the luminaire cavity.
Local note for Long Island, NY: Always verify adoption and amendments with the Authority Having Jurisdiction. Town and village requirements can differ; coordinate early with plan review to avoid rework.
Selection steps
Step 1: Identify the system. Are you maintaining fluorescent or HID, or converting to LED? For LED, confirm whether you have Type A (ballast-compatible), Type B (line-voltage lamp with internal driver), or Type C (lamp with external driver and new lampholders) before ordering parts. For recessed upgrades, consider retrofit LED modules for faster closeout.
Step 2: Match electrical specs. For LEDs, match driver output current first, then confirm the voltage window covers the LED array’s forward voltage at operating temperature. For fluorescent, match lamp type and ballast factor to meet light level targets. If you maintain HID, size from the lamp/ignitor data or move to listed metal halide ballasts with the correct wattage.
Step 3: Pick the control method. Verify 0–10 V, DALI, or phase-cut compatibility on both the driver and control. For 0–10 V, confirm current-sinking vs current-sourcing behavior before you pull cable [2].
Step 4: Check environment and ratings. Temperature, ingress (damp/wet), surge immunity, and driver case style matter. Confirm the UL 8750 listing scope for the driver and the luminaire or kit [3].
Step 5: Plan parts and wiring. Include the correct disconnect for double-ended lamps where required by NEC 410.71 [1], and land low-voltage controls cleanly. Stock suitable control cable such as 0–10 V control cable for longer runs.
Sizing and configuration examples
- LED driver current match: An LED array rated 700 mA with a typical forward voltage of 36 V needs a constant-current driver set to 700 mA. Power is P = V × I = 36 V × 0.70 A = 25.2 W. Round up to a 30 W driver in the correct voltage window, for example 30–42 V, to allow headroom.
- Ballast factor and light level: If a space was balanced for BF 1.00 and you install BF 0.88 ballasts, expect about 12 percent lower lumen output. For areas with tight light level requirements, keep BF consistent across rooms.
- 0–10 V run check: A 100 ft home run using 16 AWG (about 4 Ω per 1000 ft) is roughly 0.8 Ω round trip. At 0.5 mA control current, voltage drop is V = I × R = 0.0005 A × 0.8 Ω = 0.0004 V, which is negligible. Long chains or different control currents change the math; verify from driver datasheets and 0–10 V behavior guidance [2].
Installation & wiring notes
- De-energize and verify. Lock out the circuit and verify absence of voltage with a listed tester. Use voltage testers before opening a ballast cover or driver can.
- Provide the disconnect where required. For fluorescent or LED luminaires that use double-ended lamps and have a serviceable ballast or LED driver, NEC 2023 410.71 requires a luminaire disconnect, internal or external. Add one when you replace a ballast or driver in an existing unit [1].
- Respect listings. Keep components inside their rating and follow instructions to maintain the listing per NEC 110.3(B). For LED components, verify that the driver or kit is within the scope of UL 8750 and compatible with the host luminaire [3].
- Class 1 vs Class 2 control conductors. Identify how the driver classifies the 0–10 V control input. Maintain separation from power conductors as required when the control wiring is Class 2/3. Keep splices accessible.
- 0–10 V polarity and method. Some systems are current sourcing, others are current sinking. Get this wrong and dimming will be erratic or nonfunctional. See DOE’s findings on 0–10 V behavior [2].
- Make clean terminations. Use listed connectors sized for conductor gauge. Push-in or lever connectors speed closeout in tight cans; see push-in connectors.
- Thermal reality check. Drivers dislike heat. Confirm case temperature ratings and keep drivers away from insulation blankets or warm plenum air. If the cavity runs hot, choose a driver with higher Tc or move the driver remote within listing limits. See UL 8750 safety framework [3].
Testing, commissioning, documentation
- Live-dead-live. After wiring, energize briefly to verify operation, then de-energize and re-check terminations before final close. Use power test equipment for continuity and insulation resistance as needed.
- Dimming function check. Sweep the control from 0 to 10 V. Confirm full off if specified. If the system uses phase-cut dimming, verify driver compatibility per the submittal. Evaluate low levels onsite where occupants will notice performance most.
- Label the luminaire. If you convert a ballast system to an external LED driver or Type B TLEDs, apply permanent labels describing supply, wiring, and lamp type. Note the disconnect rating where installed.
- Record settings. Capture driver current setting, dimming curve, and any DIP or programmable options. Photograph nameplates for the closeout package.
- Surge protection. Add upstream SPD where sites have voltage events. It protects drivers and reduces nuisance failures. Stock options live under AC surge protective devices.
Troubleshooting
- Flicker or shimmer: Check dimmer compatibility and control method. Many issues come from mixing phase-cut controls with drivers that expect 0–10 V, or from drivers that use PWM at low levels. Try a listed dimmer or a driver with low temporal light modulation data.
- Lights will not reach full output on 0–10 V: Some systems cannot source enough current to drive the control up to 10 V. Verify whether the driver input is current sinking or sourcing and match the control accordingly [2].
- Buzzing or hum: Swap aging magnetic ballasts for electronic units. If already electronic, check mounting, grounding, and nearby transformers that can induce noise.
- Delayed start or dropout: Confirm line voltage, check driver minimum load, and verify that the driver’s voltage window covers the LED array at operating temperature.
- Overheating: Measure driver case temperature after 30 minutes at full load. If near or above the driver’s Tc rating, relocate within listing limits or choose a driver with higher rating.
- After a ballast or driver swap, fixture trips the breaker: Re-check wiring, especially neutral continuity and control conductor separation where Article 725 applies.
Common mistakes
- Skipping the luminaire disconnect when replacing a ballast or driver in a fixture with double-ended lamps. NEC 410.71 requires it for new work and when you add or replace the ballast or driver in existing units [1].
- Mismatching 0–10 V behavior. Drivers can be current sinking or sourcing. Confirm before you pull cable or land controls [2].
- Ignoring listings. UL 8750 sets safety requirements for LED equipment. Keep parts inside their ratings and follow instructions to maintain the luminaire listing [3].
- Letting control and power conductors mingle. Maintain separation per Article 725 when required by the driver’s control class.
- Undersizing drivers. Always match output current and verify that the voltage window covers the LED array across temperature.
Parts to stock and “Shop at Revco”
- Constant-current LED drivers matched to common setpoints like 350 mA, 700 mA, and 1,050 mA. See stocked LED drivers.
- Electronic fluorescent ballasts and metal halide ballasts for legacy sites.
- 0–10 V control cable and 0–10 V dimmer modules.
- Listed connectors sized for fixture whips.
- Site protection and test gear: AC SPDs and voltage testers.
When to call the AHJ or an engineer
- Any luminaire modification that affects the listing, including field-installed drivers or retrofit kits in critical spaces like healthcare, education, or assembly.
- Emergency lighting, generator or inverter interfaces, and controls tied to life safety systems.
- Large networks of 0–10 V or mixed control types where voltage drop, isolation, or interference could be an issue.
- Unusual environments such as wet locations, hazardous locations, or very high ambient temperatures.
Long Island note: Confirm local adoption and amendments with the AHJ. Town or village requirements can change submittal, disconnecting means, and labeling scope.
Safety disclaimer
Work on de-energized equipment only. Lockout and verify absence of voltage. Install and use products per their listing and manufacturer instructions. Follow NEC 2023 and any local amendments. When in doubt, consult the AHJ or a licensed engineer. Always verify requirements with your Authority Having Jurisdiction and the current manufacturer instructions before you order or install.
FAQ
- Do I always need a luminaire disconnect? For fluorescent or LED luminaires that use double-ended lamps and have a serviceable ballast or driver, yes. Add one when you replace the ballast or driver in an existing unit [1].
- How do I pick a replacement LED driver? Match output current first, then ensure the voltage window covers the LED load. Check dimming method, ambient temperature, and form factor.
- Why do my lights stop brightening around 6–7 V on a 0–10 V control? The driver or control may not source or sink enough current to reach 10 V. Use matched components or a control interface [2].
- Can I run 0–10 V control wires with power conductors? Only where permitted by Article 725 and the product listing. Keep required separation for Class 2 or 3 conductors.
- Will 0–10 V dimming always save energy? Generally yes, because input power drops with control voltage. Actual savings depend on the ballast or driver design and dimming curve [4].
- What causes LED flicker at low dim levels? Incompatible dimmers, PWM inside drivers, and line noise are common causes. Choose compatible parts and test the range that matters.
Author: Revco Editorial Team — Electrical Content Editor
Technical review: Pending — add approved name/credential
Contact: (631) 283-3600
About Revco Lighting & Electrical Supply
Since 1978, Revco Lighting & Electrical Supply has been helping professionals bring their projects to light—literally. As a go-to source for lighting and electrical products across Long Island, NY and nearby areas, we specialize in supporting contractors, builders, and industry experts with practical solutions and dependable service. Whether it’s a complex commercial build or a simple residential upgrade, we’re here to make sure you have what you need, when you need it.
Sources
- Electrical License Renewal. “NEC 2023 410.71: Disconnecting Means for Fluorescent or LED Luminaires Using Double-Ended Lamps.” electricallicenserenewal.com. Retrieved August 2025.
- U.S. Department of Energy, Solid-State Lighting. “The Energy and Operational Impacts of Using 0–10 V Control for LED Streetlights” (Dec 2023). energy.gov. Retrieved August 2025.
- Intertek. “Standards Update Notice: UL 8750” (July 2, 2024). intertek.com. Retrieved August 2025.
- NEMA Lighting Systems Division. “LSD 73-2015 (R2021): Energy Savings with Fluorescent and LED Dimming.” nema.org. Retrieved August 2025.
Tags: #ballastreplacement #ballastsanddrivers #electronicballasts #fluorescentballasts #leddrivers #lightingefficiency #lightingupgrades